Superhubs
A hub englobing multiple hubs within the same geographic region is called a superhub. Superhubs add two additional functionalities to the Labdoo system:
- They are allowed to create hubs inside their region. This feature helps to decentralize the process of creating hubs enabling a more sustainable growth path and removing possible centralized bottlenecks.
- They can have their own site pages. Superhubs can create their own Labdoo pages to help better localize certain regional activities. For instance, they can write an informative page in a specific language to help outreach in the geographic area where the hubs under the superhub reside.
In the next two sections, the above two features are described in more detail.
Creating New Hubs
Labdoo users who have the "superhub" role assigned are allowed to create new Labdoo hubs. (For information on what a hub is, please refer to the Hubs Section in the 'Values and Principles' wiki book.) The process of creating a new Labdoo hub is as follows:
- Initial contact. The group soliciting to create a hub contacts Labdoo. This can be done through different ways, including getting in touch with an existing neighbor hub or by directly emailing contact@labdoo.org. Such request is propagated to the Labdoo superhub in charge of the region where the new hub is to be created.
- Explaining what a Labdoo hub is. The superhub explains the potential hub manager candidates how a Labdoo hub works. It is recommended to do such communication using a phone call (can be a regular or Internet-based phone call) to ensure a proper conversation. This page explains what a hub is.
- Creation of Labdoo user accounts. Once decided that the hub is to be created, if the candidates don't have a Labdo user account yet, they need to create one for each of the users that will be managing the hub by going to https://www.labdoo.org/user/register.
-
Creation of the hub. The superhub creates the new hub by going to the create hub page (this page is available only to users who have superhub rights and it can be found under the 'Hub' tab in the 'Main Navigation Menu') and filling in all the necessary information:
- Title. Fill in the title following the naming convetion 'Labdoo Hub HUBNAME', where HUBNAME can be the name of the city or town where the hub is located, the name of a certain suburb, district or community inside a city, or the name of the organization (such as the name of the school, university, NGO or company) hosting the hub. For examples of names, look at the existing list of hubs.
- Location. Add the location of your hub and use the map interface to pin down its GPS coordinates.
- Hub manager(s). Add the usernames of the users who will be managing this hub.
- Parent hub. Some hubs exist as supporting branches of other hubs. For instance, in certain cities, a main hub will have the help of other smaller hubs distributed across various suburbs. These smaller hubs are generally referred as 'branch hubs'. If you are creating a branch hub, select in this field its parent hub. Otherwise, select 'None' in this field. To see tree view of all the hubs and branches, refer to the 'Hubs (tree view)' page under the 'Explore' tab.
- Hub type. Select the type of supporting functions the new hub will provide. If the hub can be used as a dropping and storage location where people can bring their contributed dootronics, then check the box 'Dropping point'. If the hub is capable of sanitizing dootronics, check the box 'Sanitizing point'. Multiple boxes can be checked at the same time.
- About this hub. If you want to add additional information about this hub, you can do so in this field.
- Additional editors. Besides the hub managers, if you would like to give other users the rights to edit this hub, you can do so by adding them in this field.
-
Assigning roles. The users in charge of managing the hub need to be given the additional role of 'hub manager'. To do this, go to each user page
https://www.labdoo-dev.org/users/USERNAME(where USERNAME is the username of the user), click on the tab 'Roles', and activate the checkbox 'hub manager' as illustrated in the next figure.Figure. To assign the 'hub manager' role, go to that user's page, click on 'Roles' and select the appropriate checkbox. 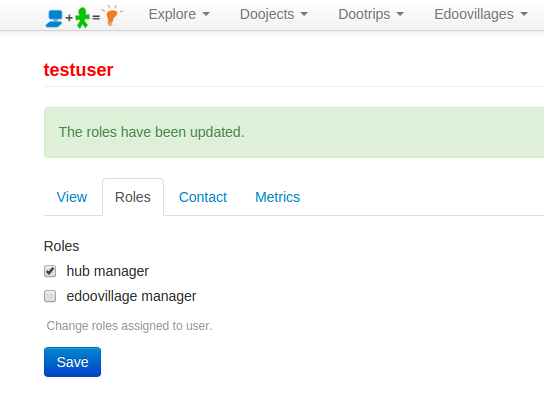
- Email the welcome message. In this last step, you need to send the "Hub Welcome Message" to the new hub managers. You will find this message under this page. Copy and paste the message into an email and send it to the hub managers.
After the above steps, the new hub managers can start their hub activities as described in the Hubs Section of this wiki book.
Adding a Superhub Page
Users with the superhub role are also allowed to create new pages in the labdoo.org platform to help manage the outreaching activities in their own regions. This feature allows this type of users provide localized content that is specific to the region they are covering.
To create a superhub page, follow the next steps (you will need to have the superhub role assigned to your user):
-
Go to the main navigation menu and click on 'Hubs', then on "[Superhub] Create content".
Figure. This is the Labdoo logo.

-
Fill in the fields to generate a new page:
- Title. Choose a title to help identify your page (the title will not be displayed, it is only used to help you identify the page).
- Type. Choose 'Page' to create a page with content. (Later we will choose "Menu block' to help create a table of contents for our pages.)
- Body. Create here the actual body of the page. To format your page, you can use any of the allowed HTML tags. See the sections 'Compose tips' and 'Special HTML tags' for descriptions on how to use HTML tags for your page body.
- Click 'Save'. At this point, you have created one single page of content. Next, repeat steps 1, 2 and 3 to create as many pages as you need to. Once you are done creating all your pages, go to the next step to create a menu block of your pages.
-
To create a menu block, do as if you wanted to create a page, except that in the field 'Type' you need to select the option 'Menu block'. A new field called 'Linked pages' will show up. In this field, add all the pages where you want your menu block to show up. Next, in the 'Body' field, you need to create a menu of all your pages. This is basically an HTML list of links, with each link pointing to one of your pages created in steps 1, 2 and 3, enabling site visitors a quick menu access to each of the pages. To create the body of your menu block, you can copy and paste the following code sample and modify it according to your pages:
<table>

<tr>

<td>

<strong><span style='color:#ff3300;'>Your SuperHub Name</span></strong>

</td>

</tr>

<tr>

<td>

<form>

<select name='URL' onchange='window.location.href=this.form.URL.options[this.form.URL.selectedIndex].value'>

<option>Choose</option>

<option value='URL1'>Title Page 1</option>

<option value='URL2'>Title Page 2</option>

<option value='URL3'>Title Page 3</option>

<option value='URL4'>Title Page 4</option>

</select>

</form>

</td>

</tr>

</table>
Substitute 'URL{1,2,3,4}' for the URLs of your pages removing the host name. For instance, if the URL of a page is
https://www.labdoo.org/content/adding-superhub-page, then use '/content/adding-superhub-page'. Substitute also 'Title Page {1,2,3,4}' for the title of each specific page.
When done, click on 'Save' to create your menu block.
At the end of this process, you will have created a set of pages and a menu block linked to the pages. Your site visitors will be able to browse all your pages by using the menu block.
If you also want to create a 'URL redirect' of your pages (for instance, if you want to map the URL https://www.labdoo.org/content/superhub-page-regionA to https://regionA.labdoo.org), please email contact@labdoo.org requesting the mapping.
Redirecting Requests to Your Superhub Using Contact Pages
As the manager of a superhub, you may want to have control on how users reach out to you. In this section you will learn how you can use the 'Labdoo Contact' page to redirect requests to your superhub.
The Labdoo contact page is located in this URL: https://www.labdoo.org/content/contact-labdoo. This contact form implements two main features:
- Message redirection. It's main feature is that when a user selects a country, if that country belongs to a superhub region, then the message generated when the user submits the contact form is forwarded to the manager of that superhub region.
- Preselection of answers. In addition, you can configure the contact form to automatically pre-select either the country or the reason the user is contacting you using the URL parameters 'co' and 're', respectively. Let's see some examples.
If you click on this URL https://www.labdoo.org/content/contact-labdoo?co=de&re=1, you will notice that both the country and the reason fields are prepopulated. That's because the country is passed in the URL with the parameter 'co=de' (which corresponds to the country of Germany) and the reason is passed with the parameter 're=1' (which corresponds to reason #1 in the list: "I want to contribute a trip (dootrip)").
This feature is useful for creating your own customized redirect buttons from your own superhub page to the general contact form in a way that you can preset the answer to each of these two questions if you know where your user is coming from and the reason he/she is trying to contact you.
For a list of country codes that you can use when setting the URL parameter 'co', you can refer to this page: https://countrycode.org/
The list of reasons codes is as follows:
're=0': "I want to contribute a laptop or a tablet (dootronic)"
're=1': "I want to contribute a trip (dootrip)"
're=2': "I want to become a Labdoo volunteer (labdooer)"
're=3': "I want to solicit laptops or tablets for my educational project (edoovillage)"
're=4': "I just want to send a message to Labdoo.org"
Here is a use case describing how to put all this together. Let's say that in your front superhub page you want to add a button dedicated to users who are in your region and who want to contribute a dootrip. Then, you would implement this button:

As you can see, when you click on the above button ('Flugpate werden', which in Germany means 'Contribute a trip'), you get redirected to the contact page with the country and reason fields prepopulated to the values of "Germany" and "I want to contribute a trip (dootrip)", respectively.
Here is the HTML code to implement the above button:
<a href="../content/contact-labdoo?co=de&re=1">
<img src="/profiles/labdoo/files/pictures/button-contribute-dootrip-de.png" width="200"/></a>
Feel free to cut and paste the above code as a template and modify it to generate your own customized contact buttons. Remember also that you can find template buttons that you can reuse from the Labdoo toolkit. Happy coding!
Managing Your Own Adwords Conversion Paths
If you are a superhub manager, you will also be able to encode your own Adwords conversion paths to help make your online campaigns more effective. (More information about conversion paths can be found on the web in places like https://support.google.com/analytics/answer/1191209).
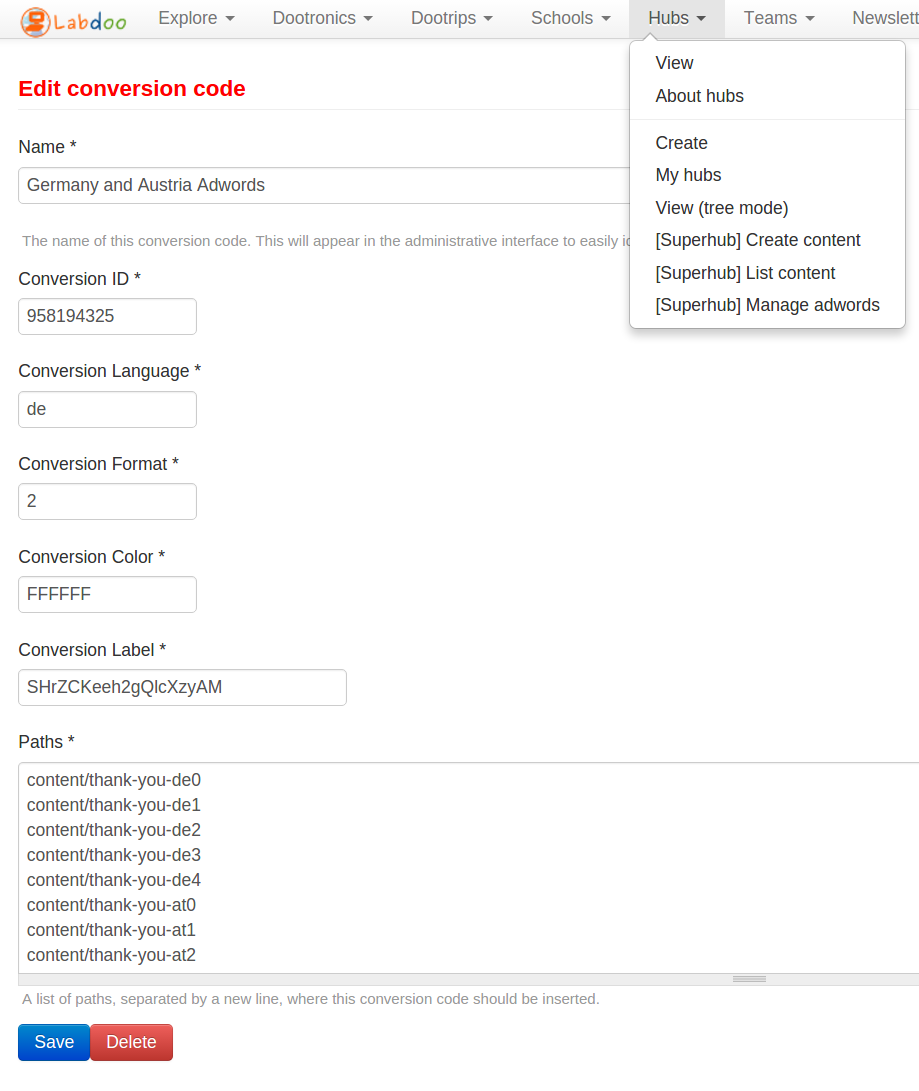
To enable your own conversion paths, click on the "Hubs" tab located at the top of this page and then click on "[Superhub] Manage adwords". (You will only be able to see this option if your user account has the superhub role enabled.) In the next page, you can edit your existing conversion paths or you can add new ones. To add a new conversion path, click on the link "Add conversion code". This will take you to a page where you can fill in all the necessary information ("Conversion ID", "Language", "Format", "Color" and "Label"). In the last field "Paths", you need to add the URL paths to the page that you want to attach the conversion path to. For instance, if the page is https://www.labdoo.org/content/thank-you-de0, then you need to enter the path "content/thank-you-de0". You can add multiple paths, each one of a separate line.
| Figure. Click on "Hubs" - "[Superhub] Manage adwords" - "Add conversion code" to add your own conversion codes. |
|