Each dootronic contributed to the Labdoo platform needs to be tagged and labeled with its unique Labdoo Indentifier (ID) to ensure that donors can track their donation all the way to the final destination school and/or the recycling factory.
The following steps describe the process of tagging a Labdoo laptop.
- Login to Labdoo.org by clicking on the "Platform" link located in the top right corner of the Labdoo Home Page.
- On the top pull-down menu, select "Dootronics" -> "Tag it!"
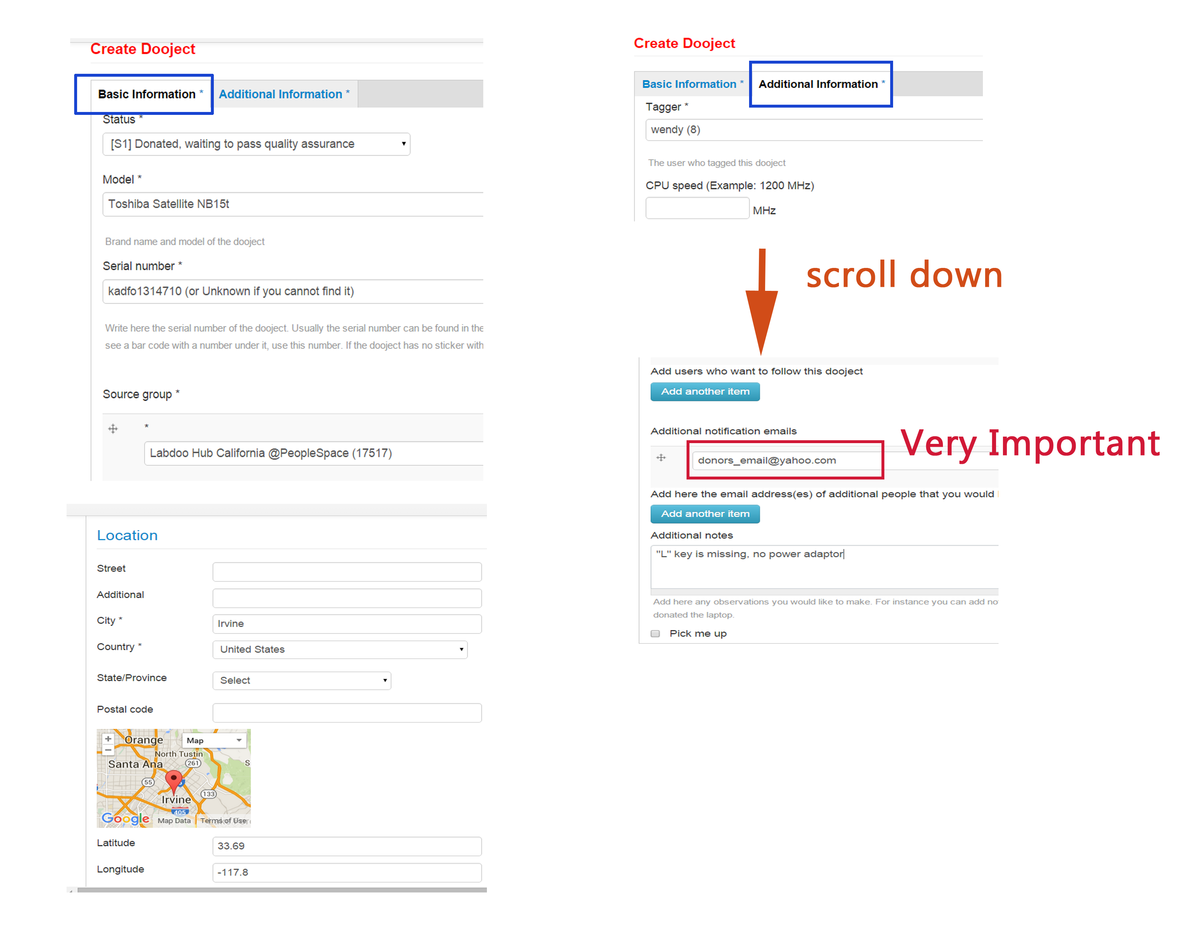
- Fill in the information about your dootronic (Make sure you fill all the fields marked with a "*")
-
If the donor desires so, it's very important to add the donor's email address to ensure that he/she can receive email updates about the status of the dootronic. Here's how:
- Under Create Dootronic, select the second tab "Additional Information".
- Scroll down to the field 'Additional notification emails'.
- Fill in the donor's email address in this field. - Click "Save" once you are done. A unique Labdoo ID number will be assigned to the laptop.
- On the new page after clicking 'save', click on "Print tags" to print the "Labdoo ID" labels. (Alternatively, you can manually write the Labdoo ID number on the preprint blank label sheets that you will find in this link.
- Tape the labels to (1) the laptop, (2) its power adapter, and all (3) the parts which come with the laptop. Ensure the taping is resistant so that the label does not get detached from the laptop.
Below is an example of a laptop tagging page.
| Figure. Example of the tagging procedure. |

|
Go back to read the previous page:
Sanitation Guide: Simple Method(英文版)

 If you have any questions about this page or if you find any errors,
please write a message to the