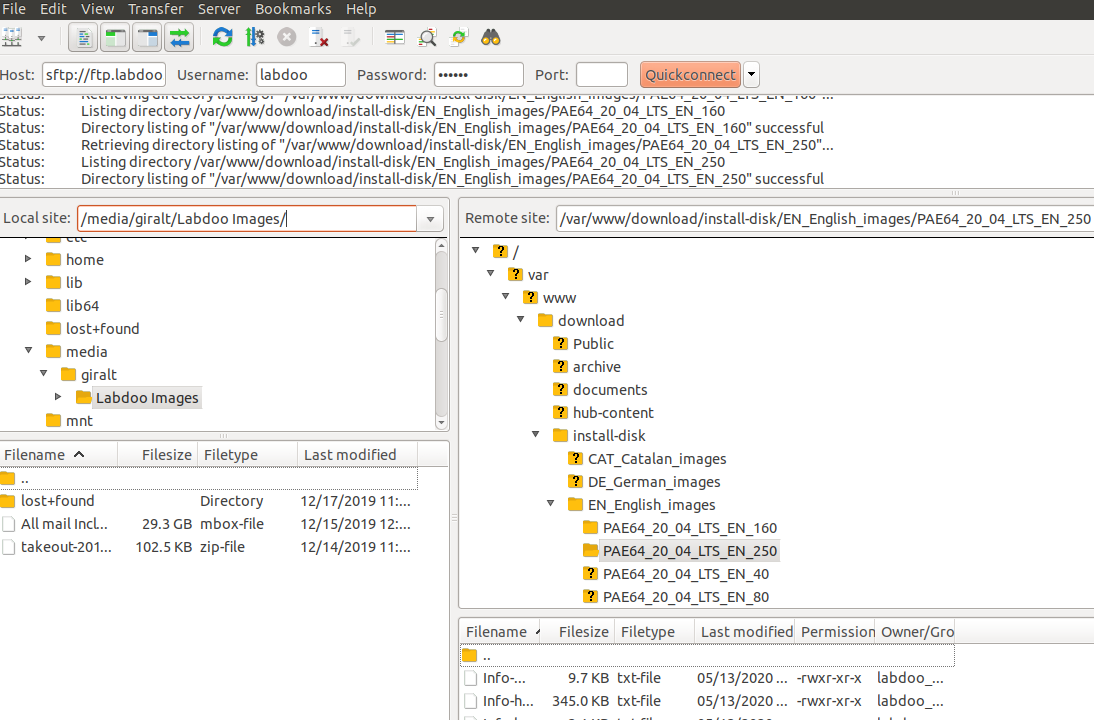
In this step, you will need an external hard drive where you will be downloading one or more Labdoo images from the Labdoo FTP server. We recommend choosing a hard drive with at least 100GB, although one with a larger capacity (e.g., 200GB, 500GB or 1TB) would be even better in case you wanted to download some of the larger images.
Start by connecting again to the Labdoo's FTP server using FileZilla (see the previous section for a description on how to do this).
Then, go to '/'. In this location, you will find multiple directories of the form XX_images, where XX indicates the language of the image. Each of these directories contains multiple images organized by size. For instance, inside the English images directory 'EN_English_images', you will find the directory 'PAE64_20_04_LTS_EN_160'. The name of this directory lets us know that we are facing a (PAE) 64-bit image based on Ubuntu 20.04 LTS, with English as the default language and with a total of 160GB of educational content. The size of the file, 160GB in this case, corresponds to the minimum size that the hard drive must have in order to be able to store this image.
Make sure that, in the field 'Local site' , you select the external hard drive where you want to download the images.
Now go ahead and download the image that you are interested in. For instance, if you are interested in downloading the image 'PAE64_20_04_LTS_EN_160', the one we mentioned above, travel to the directory '/install-disk/EN_English_images/', right-click on the directory 'PAE64_20_04_LTS_EN_160' and select the option 'Download'. The image will be automatically downloaded to your external hard drive. Download as many images as you need, provided that you have enough space in your external hard drive. Note that the process of downloading one or more images could take a significant amount of time, depending on the speed of your connection.
| Figure 1. Directory structure where you can find all the Labdoo images. |

|
Continue reading to the next page:
Installation of the Labdoo Image Using Labtix
Go back to read the previous page:
Creation of a Labtix Bootable USB

 If you have any questions about this page or if you find any errors,
please write a message to the