 If you have any questions about this page or if you find any errors,
please write a message to the
If you have any questions about this page or if you find any errors,
please write a message to the
Labtix 2
Sometimes the screen is very dark after booting and the screen cannot be brightened or darkened using the function keys. Then move the mouse to the upper left corner, if necessary "flying blind", click there and then tap on the arrow key to the right. Each time you press the arrow key, the monitor should get a little brighter.
- Double-click to start the file manager zzzFM (Labtix 2).
- Mount the drive on which the images for cloning are located.
- For external USB drives: plug it in, the drive appears with a - in front of it, then click on the entry and the "-" becomes a "+".
- Connect to the network, via LAN it is sufficient to plug in the LAN cable, for WLAN with Connman system tray, then open file manager zzzFM → in the input area (preset /home/labdoo/) den Enter the path to the server, e.g. smb://192.168.1.1/install-disk, if necessary enter the password in the terminal window. smb is the protocol required for Windows servers.
First it tries to establish a connection for the user guest, then for the user ladboo. Or you can enter a local user like this: smb://user@192.168.1.1/install-disk and then the password in the terminal window. - The drive / server is now mounted, i.e. the computer has access to it.
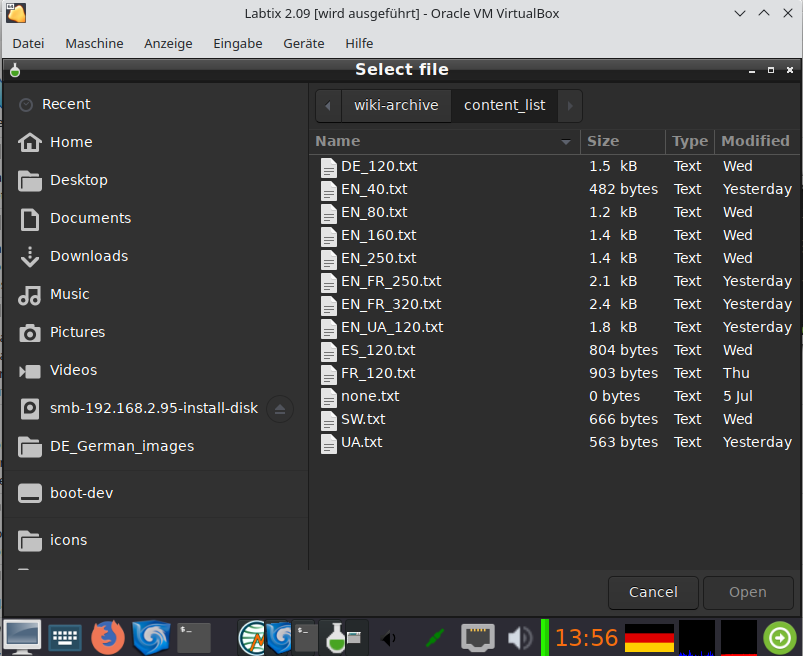
- Open the folder with the images.
- Right click on the folder containing the image to be installed.
- Click the displayed functions list on
- Labtix 2: labdoo-legacy-installer or labdoo-UEFI-installer (depending on system settings and boot)
- in the next window
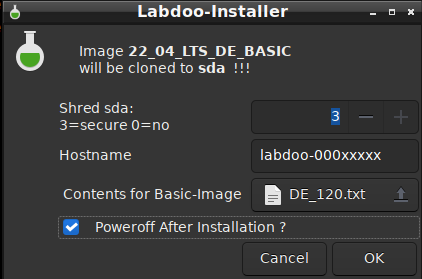
- Labtix 2: Enter the path to the target disk, e.g. sda, nvmep1n or similar → set the number of delete runs,
- optional: enter the host ID if you already know it (otherwise it can be changed after the restart)
- The image will now being copied to the internal hard disk sda.
- At the end GParted opens for control to display the finished partition on sda. The whole hard disk should be available. Close GParted. In rare cases the automatic adjustment of the partition does not work. Then it can be adjusted manually.
- The window with the installation's confirmation will appear, confirm with "ok" and close.
- The installation will be confirmed in the terminal, then close with ''Enter''.
- The installation is complete. Labtix can be shut down with "Poweroff" or "Save Poweroff" and the computer can be restarted.
| Select your BASIC-image and content package |
 |
| Select the content package |
 |
| (Example) Content package chosen and power off after installation activated |
 |
Continue reading to the next page:
Installed tools for Labtix
Go back to read the previous page:
install-disk-maker